Firm set up for admins: Addepar
Last updated: September 17, 2025
The steps below will get the Luminary integration up and running for your firm. You must be an Addepar admin to complete the following steps. If your Addepar data is not structured as required, contact us and we will determine the best way to support you.
Required Addepar Structure for Luminary Integration
Luminary built the Addepar integration to sync valuation data automatically. In order to enable this, Addepar account information must be set up in a specific way leveraging the client, household, and/or group objects for Luminary primary clients and the legal entity or account objects for Luminary entities.
Firm clients should appear as a client, household, and/or group inside of Addepar. When this object is linked to the primary client inside of Luminary, associated legal entity and account ownership can connect to a Luminary entity held by the client.
Addepar supports “legal entities” which are specific groups of accounts that are commonly used when multiple accounts are owned by a trust. As such, more than one account that belongs to the client can be grouped together under the legal entity.
If the client and legal entities are set up as described above, then an entity created in Luminary (such as an Irrevocable Trust) can be easily linked to the Addepar legal entity that ties together multiple associated accounts.
Identify Addepar Firm ID
The Firm ID is required as part of the authentication process between Luminary & Addepar.
Step 1: Select "Analysis & Reporting" as the product area for Addepar from the top menu
Step 2: View any client information in the table (doesn't matter what is selected)
Step 3: Open the overflow menu and click "Access view using API"
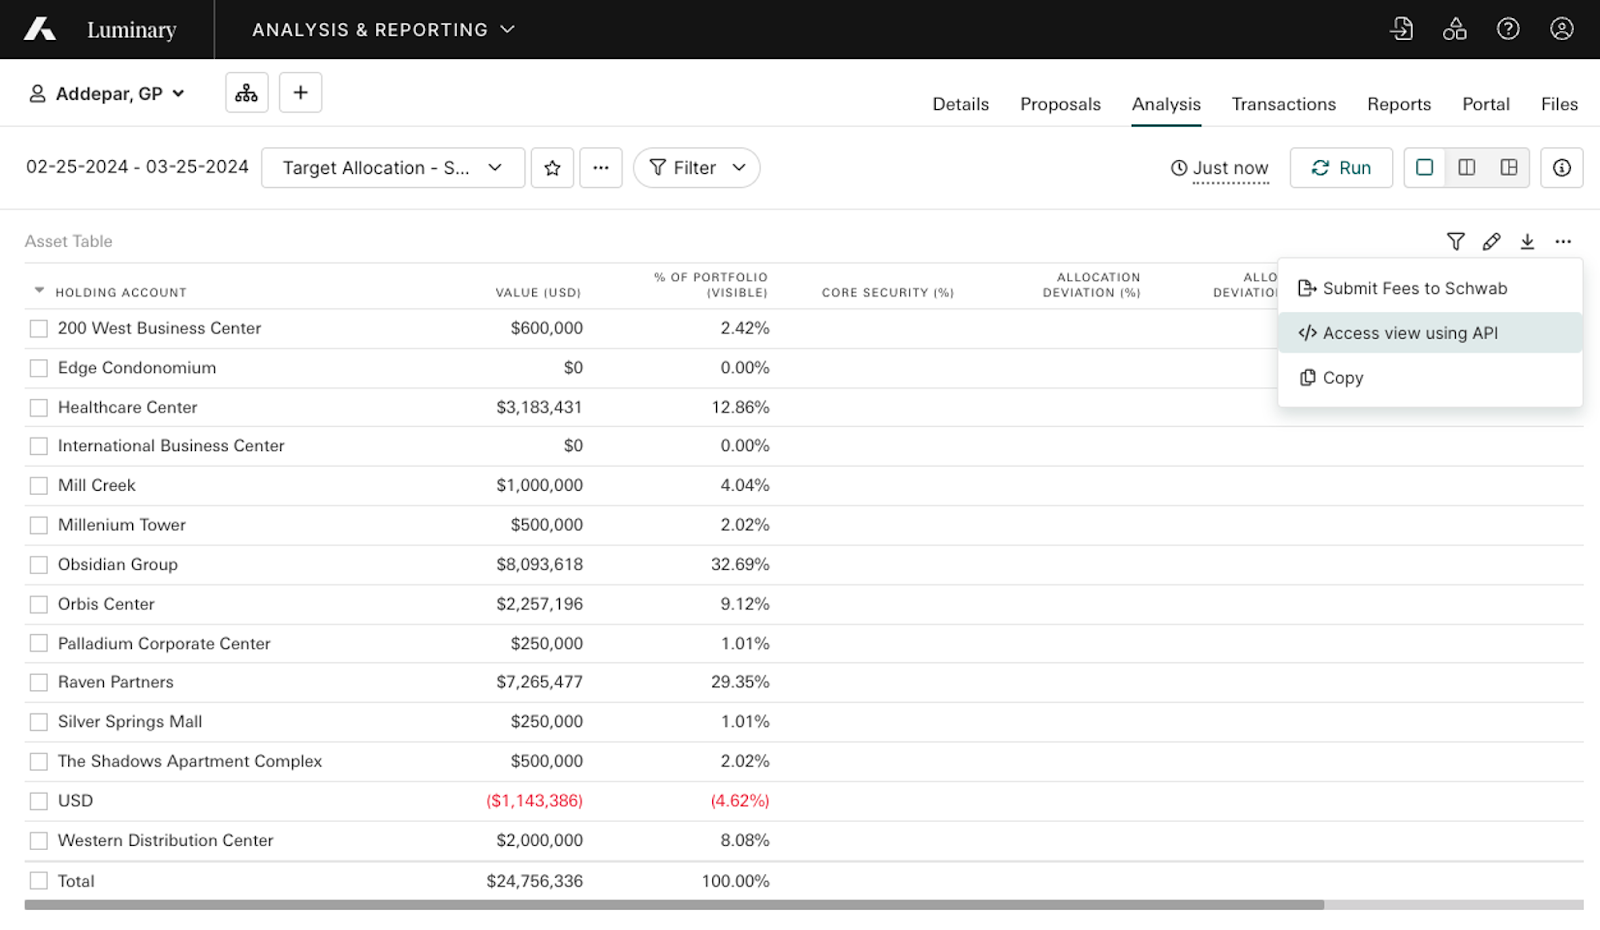
Step 4: Click next after selecting "Generate API URL"
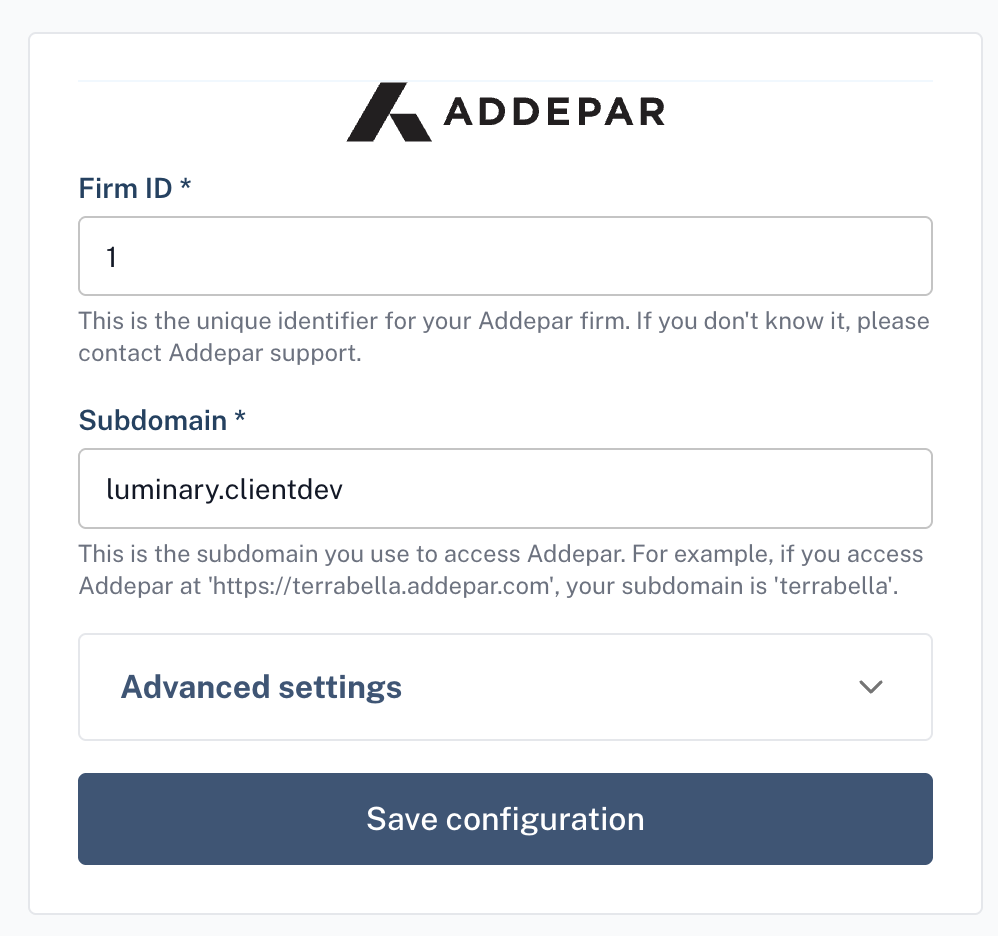
Step 5: View the URL and find the number at the end after "addepar_firm=" and the subdomain at the beginning.
The Firm ID is a parameter of the URL, example: https://luminary.clientdev.addepar.com/api/v1/portfolio/views/250/results?portfolio_id=1&portfolio_type=firm&output_type=csv&start_date=2024-02-25&end_date=2024-03-25**&addepar_firm=1
Step 6: Click the gear icon (Settings) from the top right corner in Luminary and select the “Integrations” tab. You'll see a card for Addepar where you can enter in both the firm ID and the subdomain. Click "Save configuration" when done.
Link Addepar Admin User to Luminary
Linking your firm’s Addepar admin user will enable the integration for your firm.
Step 1: Log into Luminary
Step 2: Hover over your initials in the top right corner and click “Manage profile”
Step 3: Click “Link account” which will redirect you to the Addepar sign in
Step 4: Sign into Addepar with your firm admin user
Step 5: Confirm the permissions to enable the integration
Grant Addepar User Access to Luminary
Granting user access will allow other firm users to connect Luminary to their Addepar account.
Step 1: Log into Addepar as the firm admin
Step 2: Select “Firm Administration”
Step 3: Click “Integrations”
Step 4: Select the “Luminary” integration
Step 5: Click “Automate user access” or manage access manually
Automating user access will grant Luminary access to all current and future users
Anyone without access will not be able to authorize and set up the integration
Create Integration User for Luminary
The integration user enables a nightly sync of data across all your firm’s clients in Luminary. A new user is required because admin’s won’t be able to use the same user as both the firm level integration user as well as their own individual integration user.
Step 1: Log into Addepar as the firm admin
Step 2: Select “Firm Administration”
Step 3: Click “Users” under the “User Permissions” section
Step 4: Create a new user for the integration
Name can be anything you wish to identify the user (example: Luminary Integration)
Email should be the firm admin’s email with an alias (“+luminary”) –
Such as david+luminary@yourfirm.com
✨ Tip: Most email providers will forward emails to aliases to your inbox if you add “+aliasname” to your email address.
Step 5: Open the welcome email sent from Addepar for this new user and follow the steps to sign in using the temporary password provided by Addepar
You will need to reset the password for the new integration user as part of this step
The integration user must at least have access to the Analysis tool to enable syncing
👉 Troubleshooting: No welcome email received from Addepar for the new user
Check spam to see if the invite may have gone to that folder
Try to create a new integration user again to see if was just a one-off error
If still not working, check with the IT team at your firm to confirm if email address aliases are supported
If email address aliases are not supported, then the IT team should create a new email address entirely to serve as the integration user
Link Integration User to Luminary
Linking your firm’s Addepar integration user will start the nightly sync officially.
Step 1: Log into Luminary
Step 2: Click the gear icon (Settings) from the top right corner and select the “Integrations” tab
Your Luminary user must have “administrator” permissions to access this. Please reach out to support@withluminary.com if you need to be granted Luminary administrator access.
Step 3: Click “Connect integration user” which will redirect you to the Addepar sign in
Step 4: Sign into Addepar with your new integration user (if not already signed in)
Custom Asset Class Attribute
Pull in asset class data for linked entities from a custom Addepar attribute
Step 1: Log into Luminary
Step 2: Click the gear icon (Settings) from the top right corner and select the “Integrations” tab
Step 3: Click “Edit settings” for the Addepar integration
Step 4: Open the “Advanced settings” dropdown
Step 5: Enter the asset class attribute as it appears in Addepar
Enter the API name of this data field as it appears in Addepar. It is labeled as 'API field name' and likely starts with '_custom.
Step 6: Click “Save configuration”
Step 7: Review and manage asset categories :📄 Asset category management